Transfer DV/miniDV
Step 1: Ask library staff for the adapter
- Our DV deck (Sony DSR-2000A) is in the rack. The adapter, however, is not.
- Check out the Thunderbolt-to-Firewire adapter from the Octavia Lab staff desk; DIY Memory Lab staff will connect the equipment.

Step 2: Turn on DV deck
- Make sure the DV cam deck is on. The power button is on the upper left hand side of the deck.
- When the deck screen lights up with numbers, that means the deck is on.
- Load your tape into the DV CAM deck.
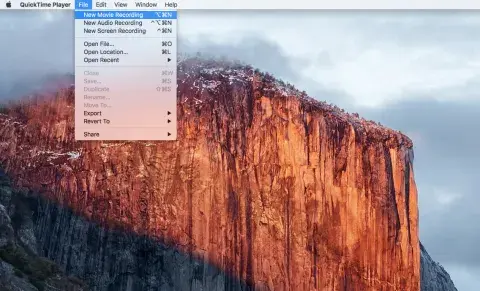
Step 3: Open QuickTime
- Once you have logged onto the Mac computer, double click the QuickTime icon in the dock.
NOTE: If the icon is not in the display, search for "QuickTime" in Finder and double click the icon that pops up. - No window will appear, but you will see a new menu in the upper right corner of the screen. Click “File,” then click “New Movie Recording”
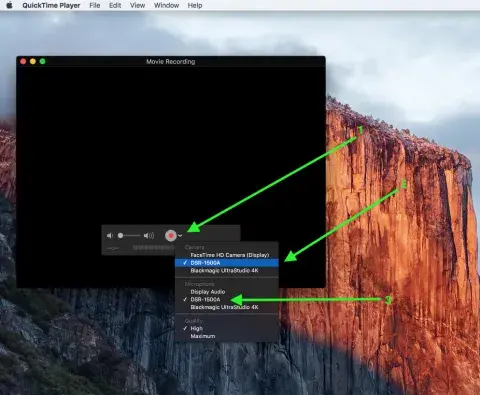
Step 4: Change the inputs
- Now you must tell QuickTime where the video and audio will come from.
- Click the down-arrow icon to the right of the red circle/record button. A menu will appear: select “DSR-2000A” under both “Camera” and “Microphone”
Step 5: Import your media
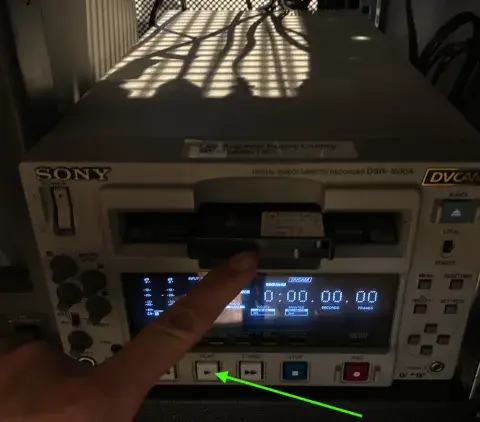
- Go back to the miniDV machine and cue your miniDV cassette to where you would like to start the recording.
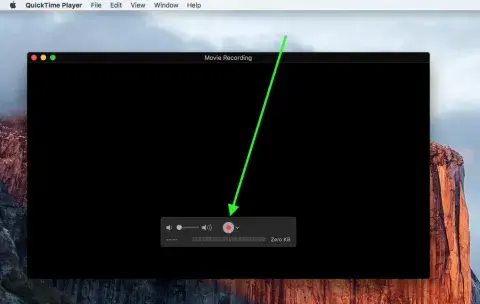
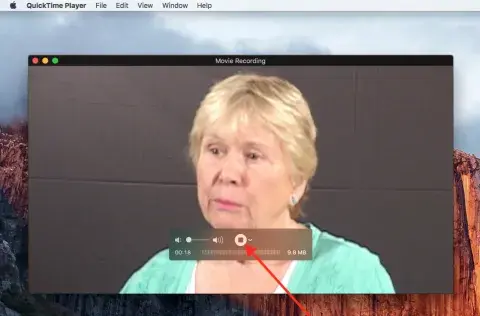
NOTE: To maximize your time, staff recommends that you use your appointment time to capture the entire tape instead of reviewing which part(s) you want to capture. Editing out digital footage generally takes less time than manually fast-forwarding to different parts of an analog tape. - In QuickTime, start the recording by clicking the red record button.
NOTE: Do NOT press the record button on the miniDV machine, as you will risk erasing your tape!
- On the miniDV machine, press the “Play” button.
- You should see your media appear in the QuickTime player.
- When you are ready to stop importing, click the stop button on the miniDV player, then the stop button in the QuickTime player.
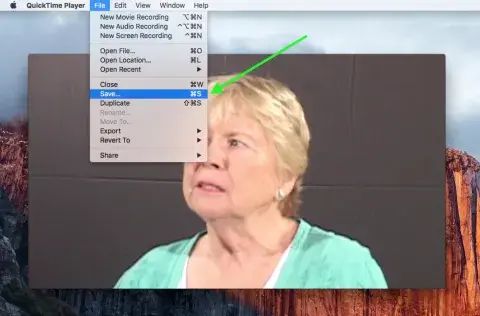
Step 6: Save your video file
- Save your file by clicking File > Save
-
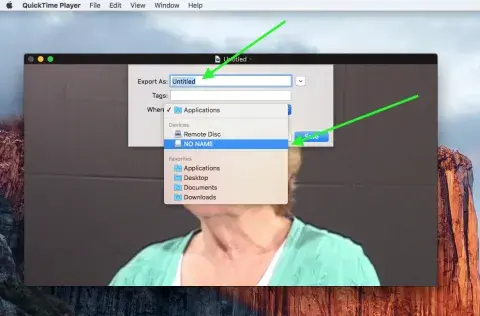
Tell QuickTime how and where to save your file by:
- Naming your file in the “Export as” field
- And selecting your memory device under “Devices.”
NOTE: You can stop your DV and/or miniDV tape at any time if you only want to capture part of the tape. DV and miniDV tapes can be 5 minutes to 2 hours long.
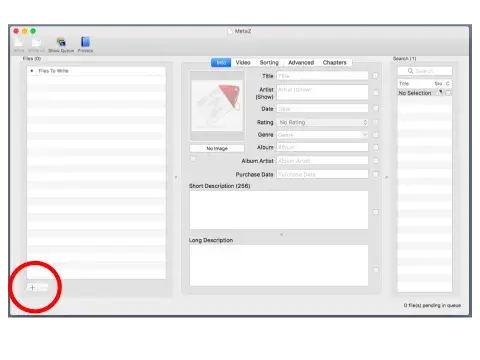
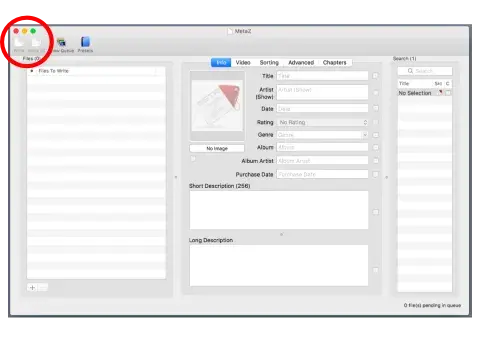
Step 7: Describe with MetaZ
- Don't let all this hard work go to waste. Adding metadata to your home movie will ensure that you have it for years to come!
- Double click on the MetaZ icon.
- Select your home movie.
- Select "Home Movie" as the Video Type.

- Enter the "Artist" name.
- Enter the title.
- The approximate date it was filmed.
- Use the Short Description box to provide other important contextual information and technical information such as: Names, Places, Description of event(s), Rights information, and How it was originally captured (VHS, MiniDV, etc.).
- To save your information, select the Write icon in the top left corner of the window.
Step 8: You are done
- Return the adapter to the Octavia Lab library staff.
- Do not forget your tape and memory drive.