The DIY Memory Lab supports transfer of the following types of vinyl records:
LPs (Long Play 10-inch or 12-inch)
45s (7-inch)
You must bring your own headphones if you want to listen to your vinyl transfers.
Please do not adjust the anti-skating dial on the turntable; it is preset.
Step 1: Let Octavia Lab staff know you are transferring vinyl. Check out the turntable.
Plug the turntable’s power cord into the surge protector. Connect the turntable to the computer with the USB cable.
Step 2: Load your vinyl
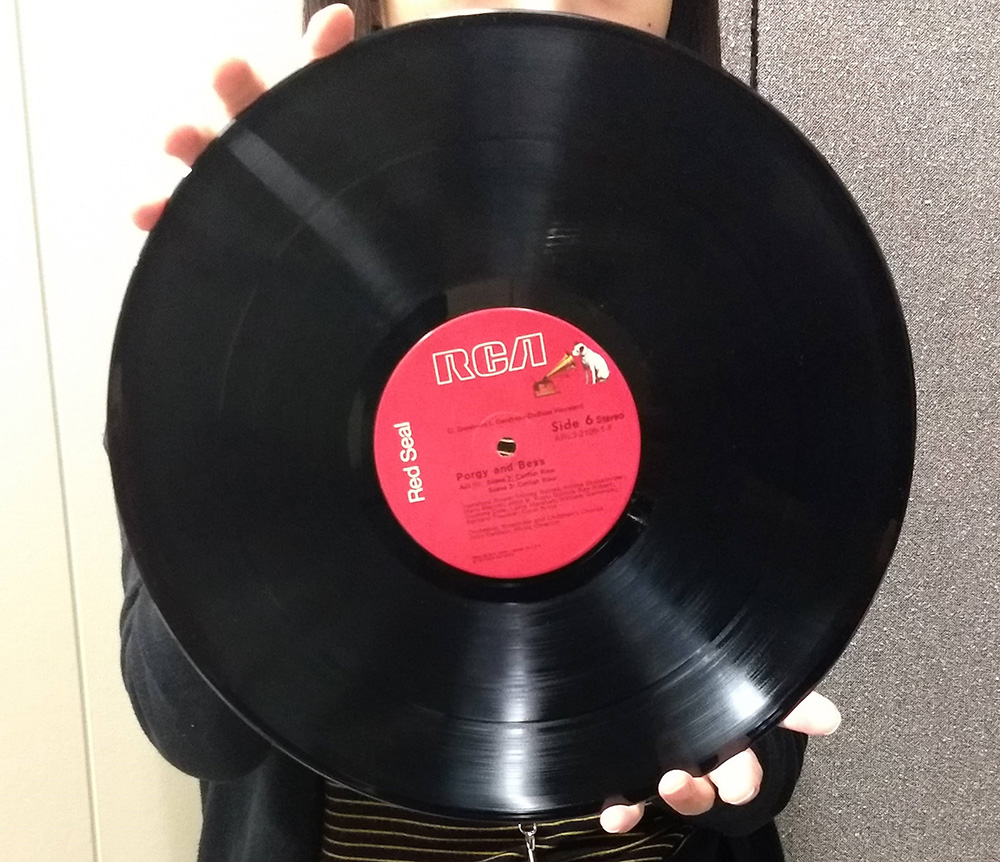
Make sure to handle vinyl discs by the edges with your palms. Do not touch the grooved areas where the recorded content is. Finger oils attract dirt and dust, which affects the quality of playback.
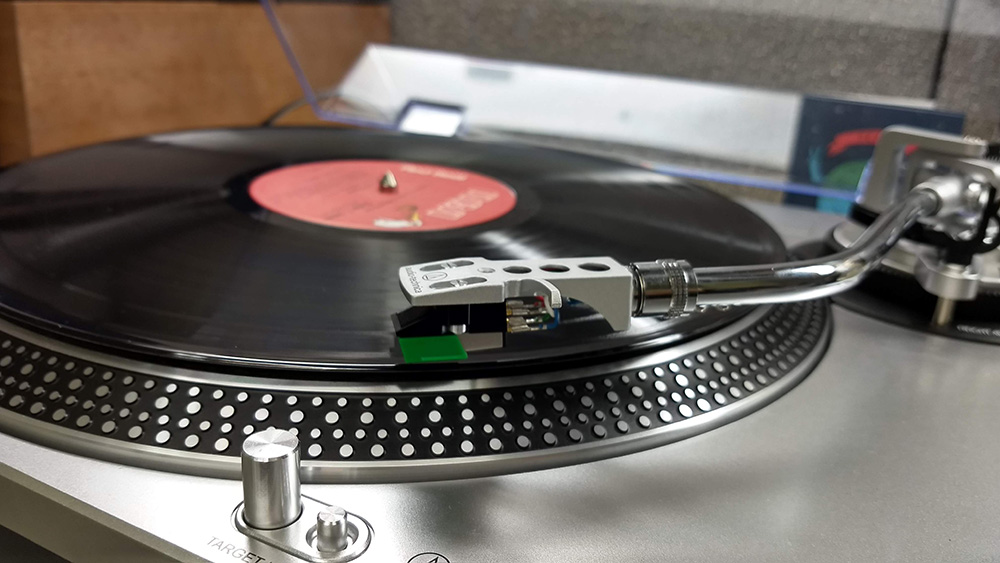
Open the dust cover on the turntable. Place an LP (Long Play 10 inch or 12 inch) record on the turntable.
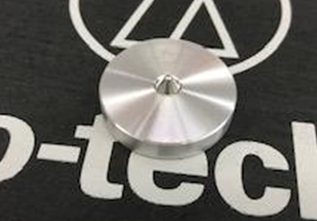
If you are digitizing a 7-inch 45 (with a large hole in the middle) then you must use the insert.
Place the insert below over the spindle at the center of the turntable, then place the 45 record over it.
Step 3: Power on the turntable
The power knob is on the bottom left hand side of the turntable. Rotate the knob clockwise to power on the turntable.
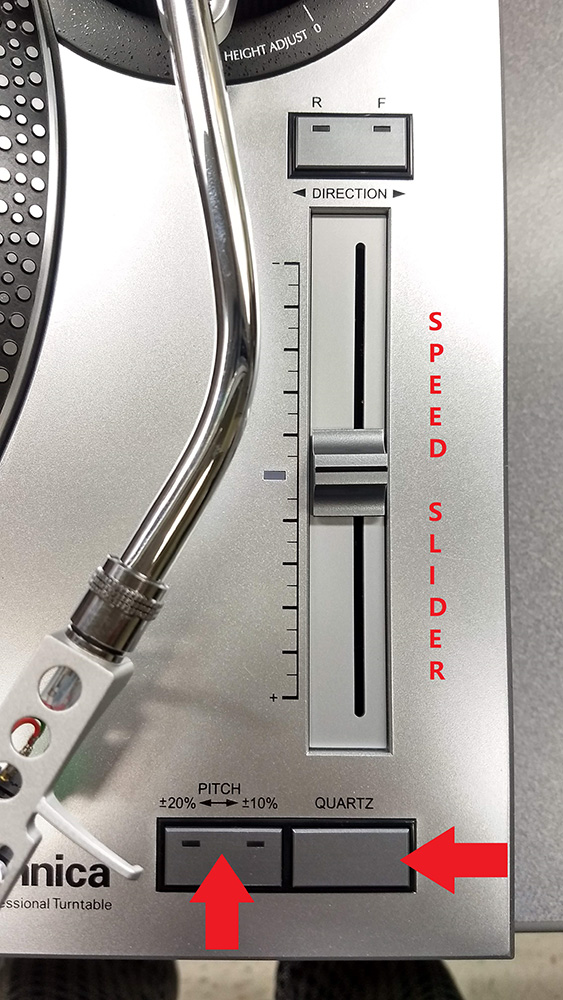
Step 4: Set the record playback speed
Select Quartz mode to lock the turntable at the exact speed of 33 ⅓ rpm.
To change the pitch of the record, press the Pitch control button and use the speed slider control to make the record spin faster or slower than 33 ⅓ rpm. The center position of the slider is set for normal speed playback, but it is best to use the Quartz button for normal speed Quartz-lock playback.
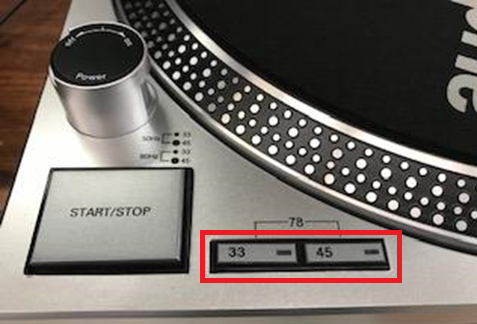
Select the speed: 33 for 10-inch and 12-inch LPs.
Note: EP (extended play) records can be 7-inch, 10-inch or 12-inch discs and are intended for playback at either 33 or 45 rpm.
Step 5: Clean your record
Use the dry brush method if your record only has dust particles on it:
Push the Start button on the turntable.
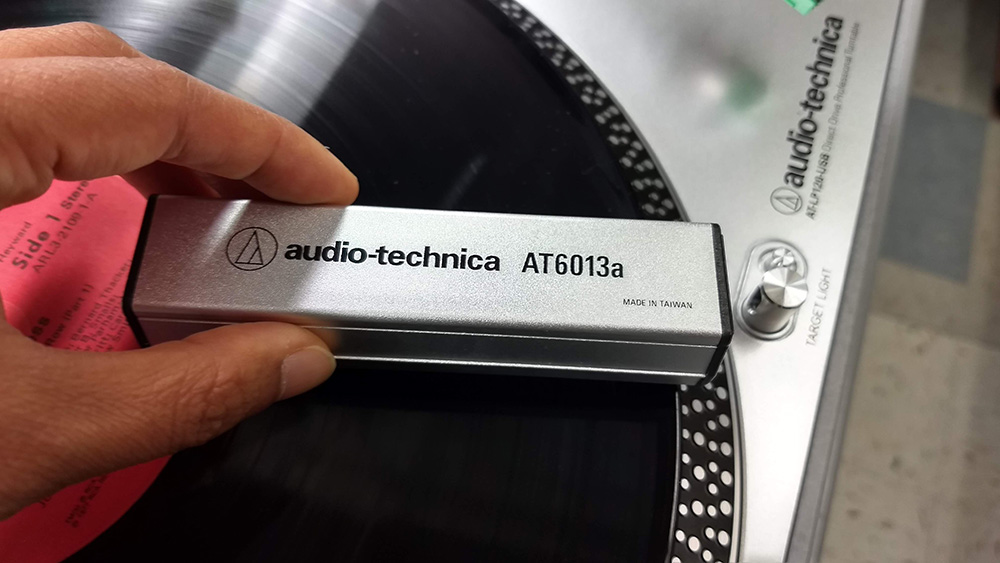
Use the Audio Technica record cleaning brush to lightly swipe the record clean.
Always clean your records moving with the grooves, never across them.
DO NOT press the brush down on the record. This causes stress on the turntable motor. Let the weight of the brush do the cleaning.
If your record is more heavily soiled, check out the RCA Discwasher kit. See cleaning instructions on the right side of this page.
NOTE: Do not attempt to clean the stylus (needle)--only staff should clean it.
Step 6: Open Audacity
Once you have logged onto the computer, double click the Audacity icon.
Note: If the icon is not there, search for Audacity in Finder and double click the icon that pops up
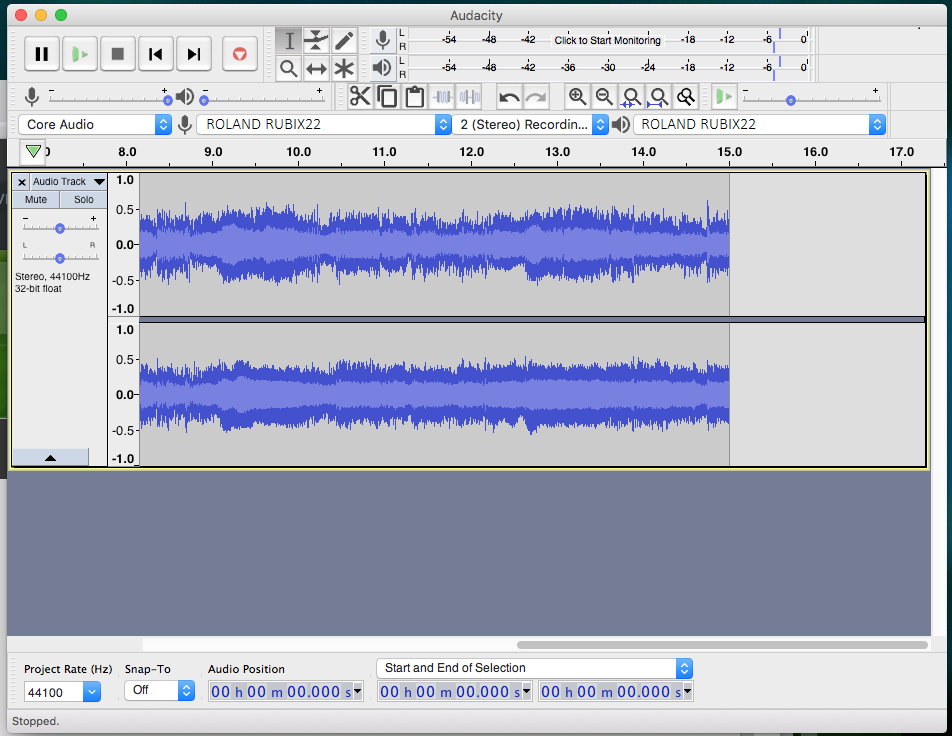
Audacity will open up to a blank screen and monitors.
Make sure of the following settings:
[mic] set to USB AUDIO CODEC
[sound] set to Built-in Output
2 (Stereo) Recording Channels or 1 (Mono) Recording Channel is selected, as appropriate
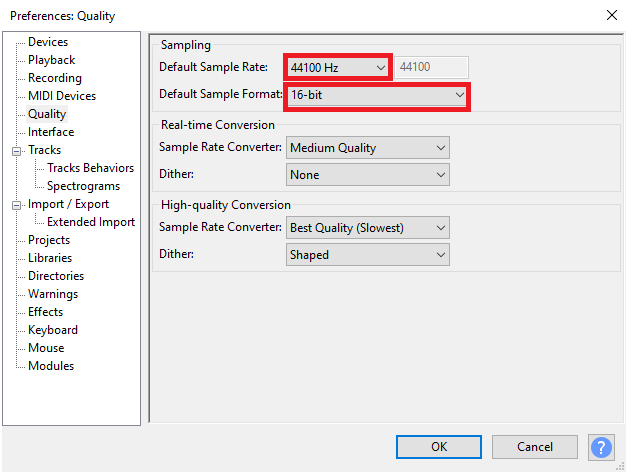
Set recording parameters for digitizing audio by going to Edit > Preferences > Quality. Recommended settings:
Sample Rate: 44100 Hz or higher
Sample Format / Bit Depth: 16-bit or higher
Step 7: Test your audio
Click on the words Click to Start Monitoring displayed over the numbers at the top of the Audacity window.
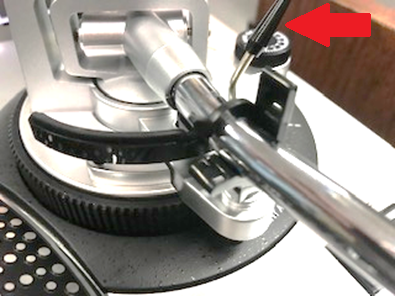
Raise the tone arm off of its base using the black lever. Once the tone arm is in the up position, gently slide the tone arm over to a point just above the outside margin of the record (outside where the tight grooves start).
The tone arm can also be lifted with the right forefinger and thumb. First unlock the tone arm lock on the tone arm rest. Be careful to place it very gently on the record so as not to damage the record or the stylus.
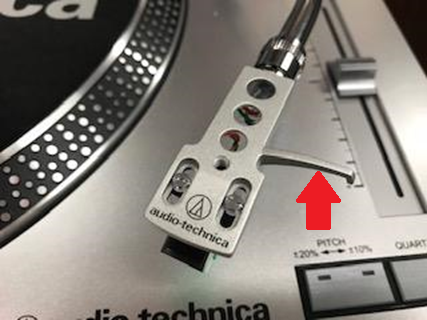
Once the tone arm is in the up position, gently slide the tone arm over to a point just above the outside margin of the record (outside where the tight grooves start).
Release the tone arm to be gently lowered onto the record and close the dust cover.
Press start on the turntable.
In Audacity, you should see green bars moving across the numbers as your vinyl is playing.
If the bars are generally below the -15 mark or above the -3 mark (and showing some red), you will need to adjust the recording volume. You can also listen to the record by plugging headphones into the computer’s headphone out jack.
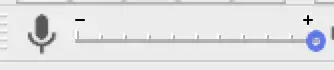
To adjust recording volume, move the slider next to the microphone icon toward the minus sign (softer) or the plus sign (louder), as shown below:
Step 8: Capture your audio
Adjust the stylus to the beginning of the record.
Press the red record button on Audacity.
Press play on the turntable.
You should see activity in the window like that in the screenshot above.
Tip: It is a good idea to record 15-30 seconds, then save and play back your file to ensure the audio levels are where you want them to be. You may then adjust the volume in Audacity to your liking if needed.
Allow the needle to play all the way to the channel groove at the end of the record before raising the tone arm so as not to cut off the last track on the record.
When you are done transferring, press the stop button in Audacity, as well as on the turntable.
Tip: The thin blank areas between tracks are called bands. To record selected tracks per side, place the raised tone arm above the band before the track, then gently lower it.
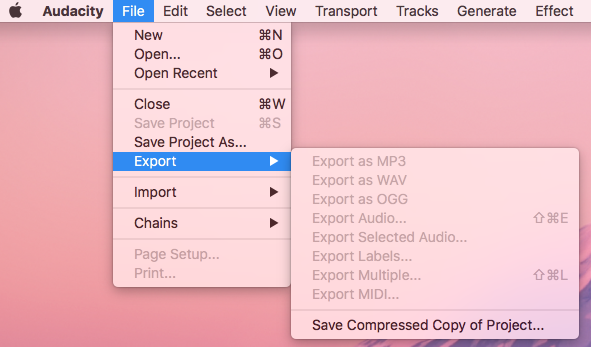
Go to File > Export > Export as WAV in the Audacity menu.
Give it a name that is consistent and obvious.
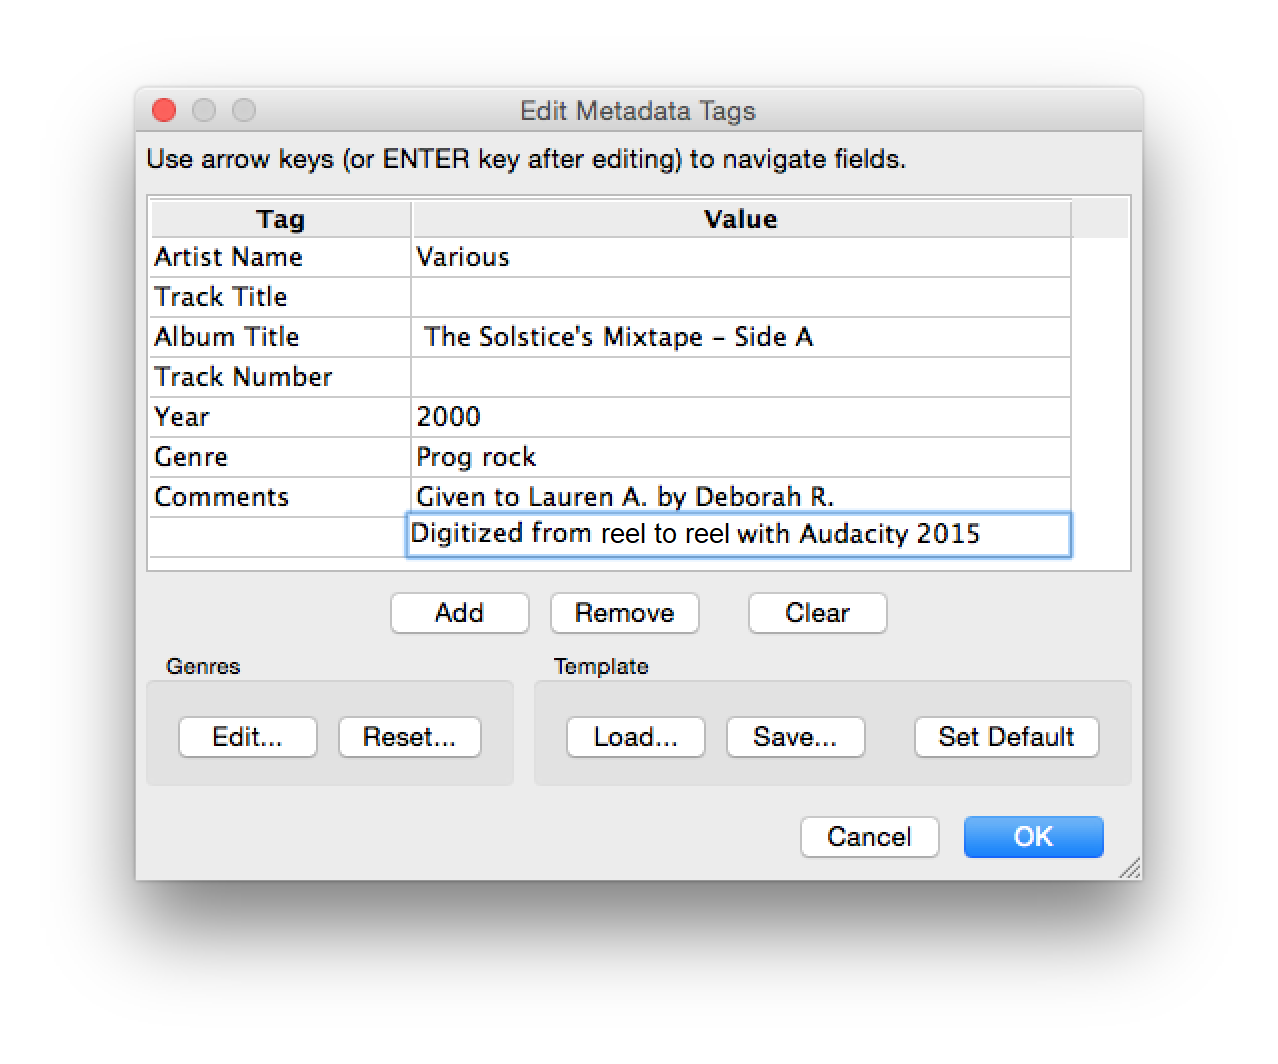
When you save the file, a window will appear for you to enter metadata (description info) about the file. Be sure to include how the file was digitized and who owns the rights to the recording.
Step 10: You are done!
Remove your vinyl record from the turntable.
Unplug the turntable power cord and USB cable.
Check the turntable back in with Octavia Lab Staff.