Put on gloves. This way you won't leave prints on your photographs and scanner.
Gently lift the scanner's lid.
Clean the scanner's surface with an anti static cloth and air puffer.
Step 2: Prepare photographs
Pick up your photographs by the edges, and use the air puffer to remove any dust.
Place photographs face-down on scanning bed. You can scan multiple photographs at once.
Be careful not to scratch the scanning bed.
Close scanning bed lid.
Step 3: Open Epson Scan
Make sure that the scanner is powered on and is connected to the computer by USB.
Connect your external hard drive or USB to the computer.
Open the Epson Scan icon located on the desktop.
Note: If the icon is not there, search for "Epson Scan" and double click the icon that pops up
Step 4: Settings and Preview
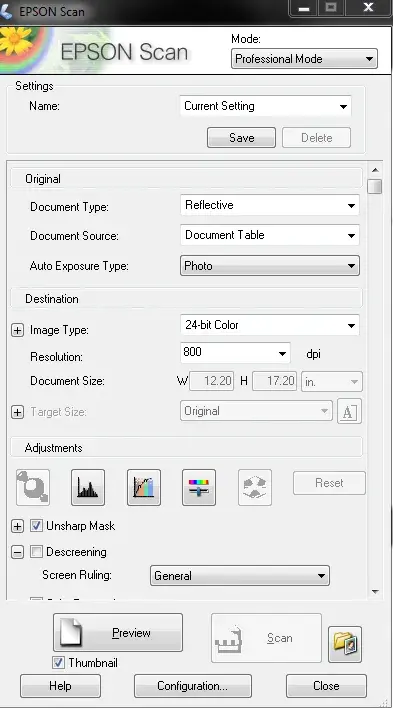
Make sure you are in Professional Mode. This gives you total control of your scanning settings and lets you preview your images
Set the Document Type to Reflective
Set the Auto Exposure Type to Photo
You can decide the other settings if you want. If you're not sure, we recommend the following:
Image type: 24-bit color
Resolution: at least 600 for photos
Step 5: Preview
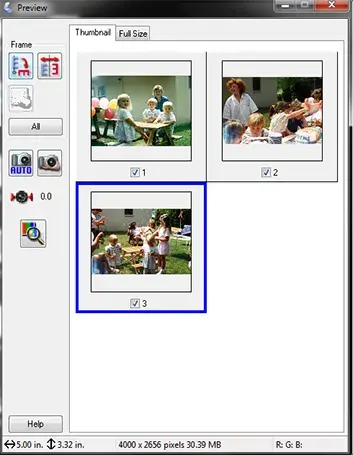
Select the Thumbnail box, then click the Preview button at the bottom of the settings window. The scanner should automatically recognize your photographs as separate files.
You can use the Frame icons on the left side of the window to rotate or flip each image that you select.
Step 6: Scan
When you click scan, the file save settings will pop up.
Create a file naming convention (something simple like event and year) and start with 001.
Choose either JPEG or TIFF under IMAGE FORMAT. (If you want to resize your image file, TIFF is better)
Click OK.
Step 7: You are done
Clean scanning bed with anti-static wipes.
Make sure scanner is powered off and closed.
Make sure your files are saved on your USB.
Do not forget to eject your USB or hard drive and your photographs.