Transfer Minidisc
Note: You must bring your own headphones if you want to listen to your minidisc transfers. If needed, you may check out a 3.5mm Stereo Jack to 1/4" Stereo Plug Adapter at the staff desk.
Step 1: Let Octavia Lab staff know you are transferring minidisc.
- Check out USB audio interface kit and XLR cables.
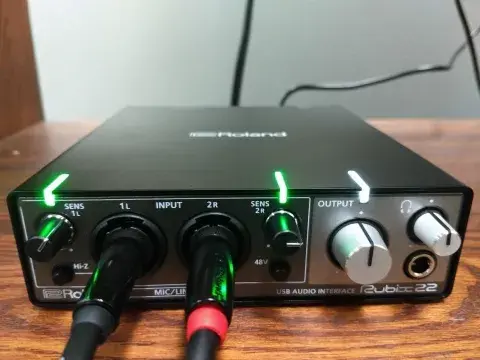
Connect the USB audio interface (Roland Rubix22) to the minidisc deck using the XLR cables.
- Ensure that left and right channels are in sync
- 1 XLR cable plugged R-OUT on minidisc player to R-IN on the Rubix22’s MIC/LINE
- 1 XLR cable likewise plugged L-OUT to L-IN
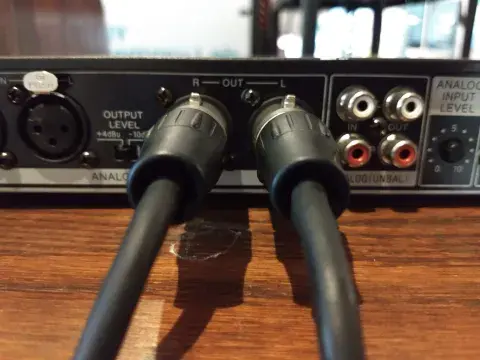
XLR Cables connected from back of minidisc player.
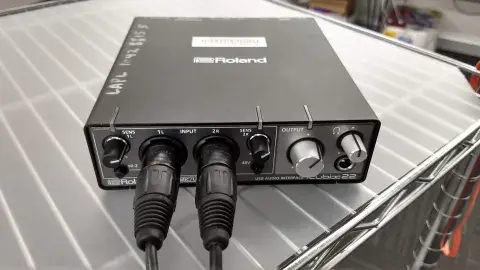
XLR Cables connected to the front of the USB audio interface.
- Ensure that left and right channels are in sync
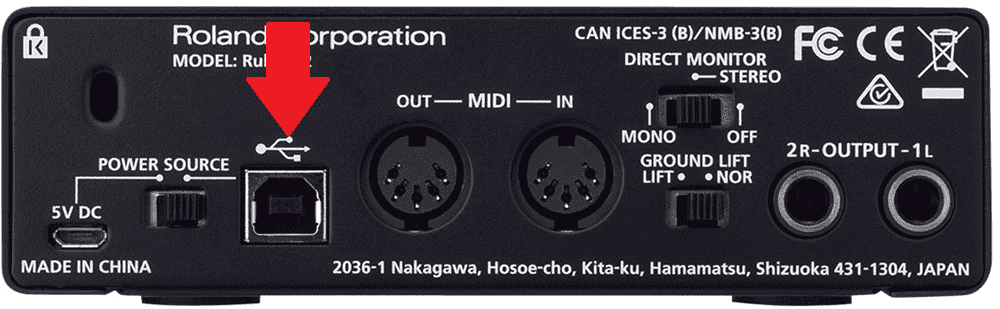
- Take the USB cable from the audio interface kit. Plug the square-ish end of the USB cable into the back of the Roland Rubix22 where it says Power Source. Plug the rectangular end of the USB cable into the computer.
Step 2: Turn on the minidisc deck
- The power button is on the left hand side of the deck. When the button is pushed in, that means the deck is on.

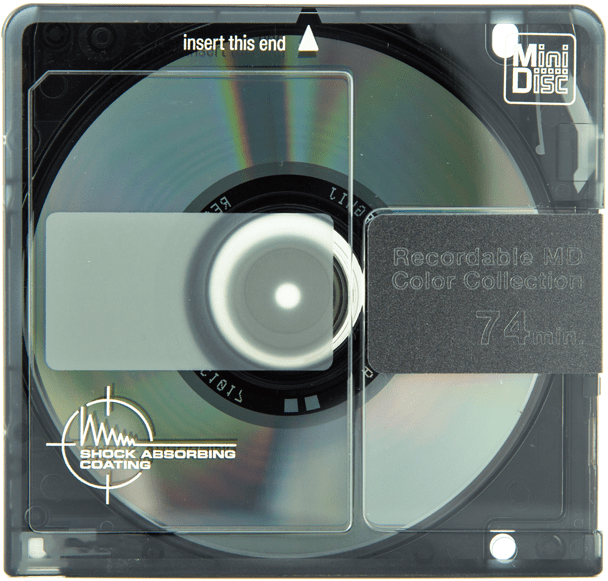
Step 3: Load your minidisc
- Insert your minidisc into the deck with its sliding door on the right-hand side.

Step 4: Open Audacity
- Once you have logged onto the computer, double click the Audacity icon.
Note: If the icon is not there, search for Audacity in Finder and double click the icon that pops up
- Audacity will open up to a blank screen and monitors.
- Make sure of the following settings:
- [mic] and [sound] are both set to Roland Rubix22 and
- 2 (Stereo) Recording Channels or 1 (Mono) Recording Channel is selected, as appropriate

Step 5: Test your audio
- Click on the words Click to Start Monitoring displayed over the numbers at the top of the Audacity window.
- Press Play on the minidisc deck. In Audacity, you should see green bars moving across the numbers as your minidisc is playing.
- If the bars are generally below the -15 mark or above the -3 mark (and showing some red), you will need to adjust the recording volume. You can also listen to the minidisc by plugging headphones into the computer’s headphone out jack.
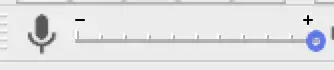
- To adjust recording volume, move the slider next to the microphone icon toward the minus sign (softer) or the plus sign (louder), as shown below:
- Adjust volume knobs for the left and right channels on the USB audio interface until the lights appear green.
Step 6: Capture your audio
- Rewind the minidisc.
- Press the red record button on Audacity.
- Press play on the minidisc deck.
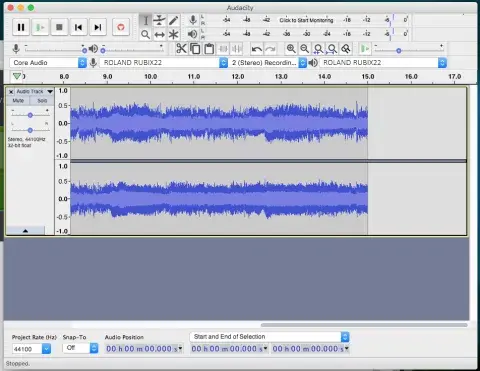
You should see activity in the window like that in the screenshot above.
- Tip: It is a good idea to record 15-30 seconds, then save and play back your file to ensure the audio levels are where you want them to be. You may then adjust the volume in Audacity to your liking if needed.
- When you are done transferring, press the stop button in Audacity, as well as on the deck.
Step 7: Save Your File onto your USB
- Make sure your USB is connected to the computer.
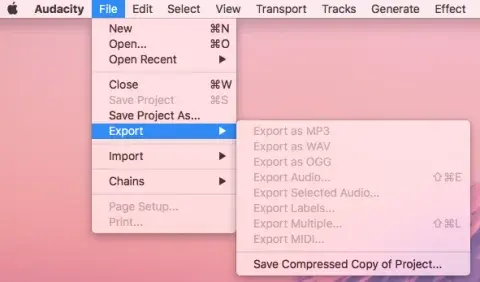
- Go to File > Export > Export as WAV in the Audacity menu.
- Give it a name that is consistent and obvious.
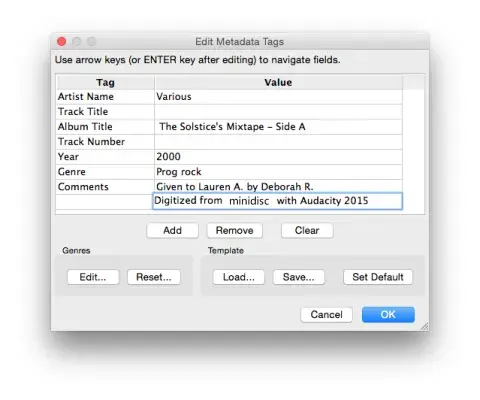
- When you save the file, a window will appear for you to enter metadata (description info) about the file. Be sure to include how the file was digitized and who owns the rights to the recording.
Step 8: You are done
- Eject your minidisc from the deck.
- Unplug the minidisc power plug and XLR cables.
- Return USB audio interface kit and XLR cables to Octavia Lab staff.
- If you checked out a 3.5mm Stereo Jack to 1/4" Stereo Plug Adapter, please return to Octavia Lab staff.
- Do not forget your USB drive and minidiscs