
Transfer VHS
NOTE: Our equipment only supports VHS formatted in NTSC, and recorded in Standard Play (SP) or Extended Play/Super Long Play (EP/SLP)
Capturing Video from VHS and S-VHS
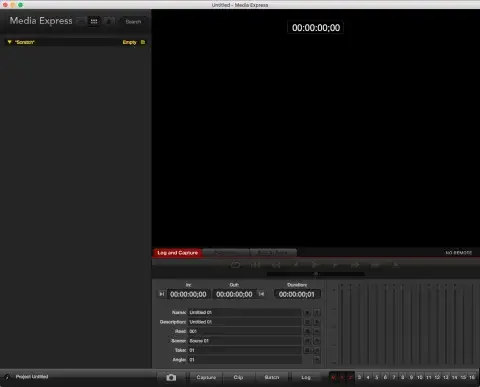
- Open Black Magic Media Express icon in the dock. It looks like this:

- Click the Log and Capture Tab immediately to the left of the green Playback tab.
-
Power on the VCR.
- Insert tape into VCR.
- Make sure the tape is rewound to the beginning.
- Click Capture in Media Express (towards the bottom of the Media Express window).
- Press Play on the VCR.
- The video feed should appear in Media Express, but the computer will remain silent. The two moving green bars at the bottom will indicate sound is being recorded.
- When video capture is over, click Capture one more time. This will end the digitization process and create a video file.
- In Media Express, the video file you just created will appear on the left side of the Media Express window. The video file will also be saved on the desktop as a MOV file.
- Check that your video file is saved to the desktop, then close Media Express.
- If Media Express asks, "Do you want to save your changes to project?" select Don’t Save.
- If you wish, you can rename your video file on your desktop by double-clicking it. In the .app toolbar, select File and then select Rename.
- Eject your tape.
Compressing and Saving Video
- Insert your personal USB storage device into the computer's USB port.
-
Open Handbrake software on the computer. It looks like this:

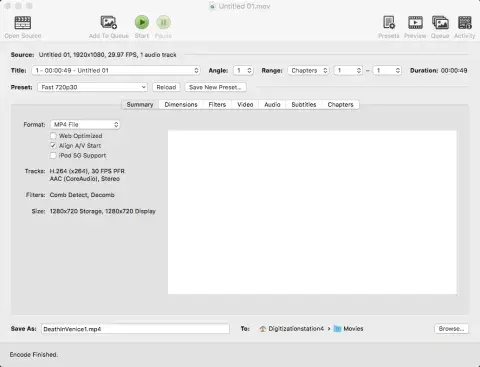
- Open your video file in Handbrake.
- The file should have saved to the desktop from Media Express.
- If Handbrake’s Open Source window is not already open, select the Open Source icon in the upper left corner.
- Choose video resolution: Select the Preset drop down menu.
- Select General.
- Select Fast 720p 30 or whichever resolution you prefer.
- Choose video file format: Select the Format drop down menu.
- Select MP4 or whichever file format you prefer.
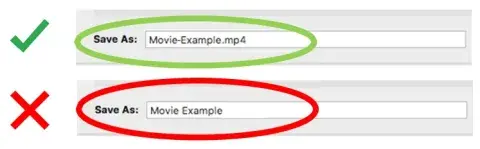
- Near the bottom of window you will find the Save as text box.
-
Under Save as make sure the file extension is part of the file name. For example, file name should be XMAS1990.mp4, not XMAS1990. If the file extension is not included in the file name, the video will not play on all platforms.
-
- Click Browse to choose where the file will save (near bottom right).
- Select the storage device you brought with you and hit choose.
- Your storage device will be listed under locations in the browsing window.
- Press the green Start button (near top of Handbrake window). This will compress your file, making it a more reasonable size.
- The compressed video file will automatically save to the storage device that you selected.
- When the file is finished compressing, close Handbrake.
- Check your storage device to make sure that your movie is saved.
-
Describe your file in MetaZ. Adding metadata to your home movie will ensure that you have it for years to come.
- Click on the MetaZ icon in the dock.

-
Click on the plus (+) sign to select your home movie.
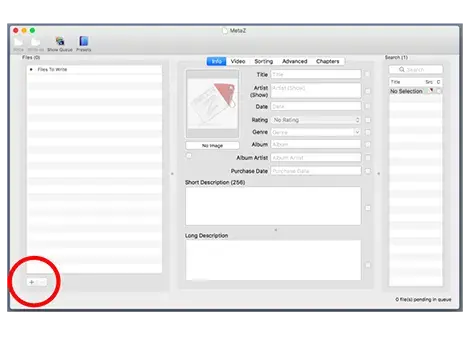
- Select Home Movie as the Video Type.
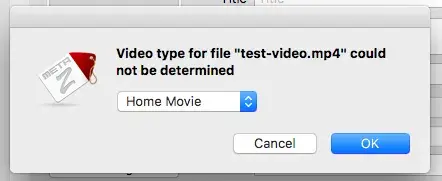
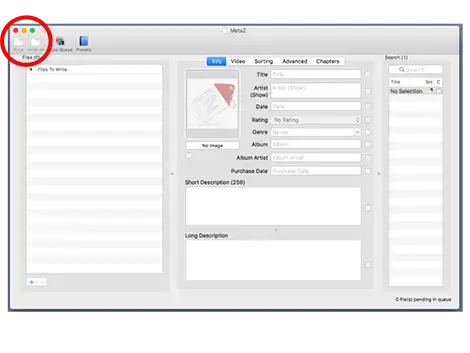
- Enter the Artist name.
- Enter the Title.
- Enter the approximate Date it was filmed.
- Use the Short Description box to provide other important contextual information and technical information such as: Names, Places, Description of event(s), Rights information, How it was originally captured (VHS-C, MiniDV, etc.).
- To save your information, click on the Write icon in the top left corner of the window.
- Delete the original uncompressed .MOV file from the desktop by placing it into the trash can at the bottom of the screen. Open the trash can and hit the empty button in the upper left corner to permanently delete your file and to prevent other users from seeing it.
- Eject your storage media.
-
Click on the Finder icon handbrake-save-as at the bottom left of the screen (the left most icon on the Dock).

-
Eject external hard drives, memory cards and more by clicking on the Eject icon next to the name of the device in the Finder window.
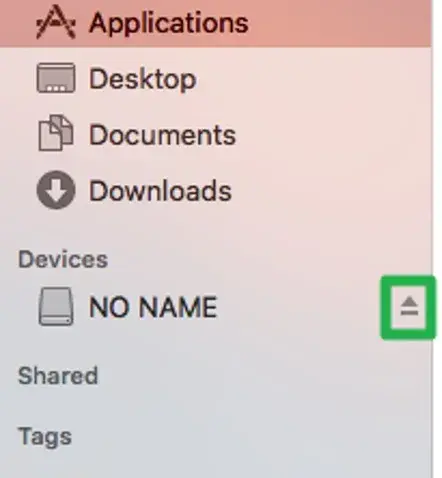
- Alternatively, you may drag the device to the Trash bin in the Dock to eject it.
-
- Inform Octavia Lab staff that you are finished using the AV Transfer station.
DIYML: Quick Guide to Digitizing VHS (Raw file)
What hardware are you using?
- VHS deck: Panasonic AG-1980
- TBC: TV One 1T-TBC
- A-D: BlackMagic Ultra Studio Express
- Computer: Apple Mac Mini M2 Pro (Sequoia) with 27-inch Thunderbolt Display
- S-Video Cable
- RCA Audio Cable
- BNC Cable
- Thunderbolt 2 cable > Thunderbolt 2-to-Thunderbolt 3 adapter
What software are you using?
- BlackMagic Media Express
- Handbrake
- MetaZ